Description:
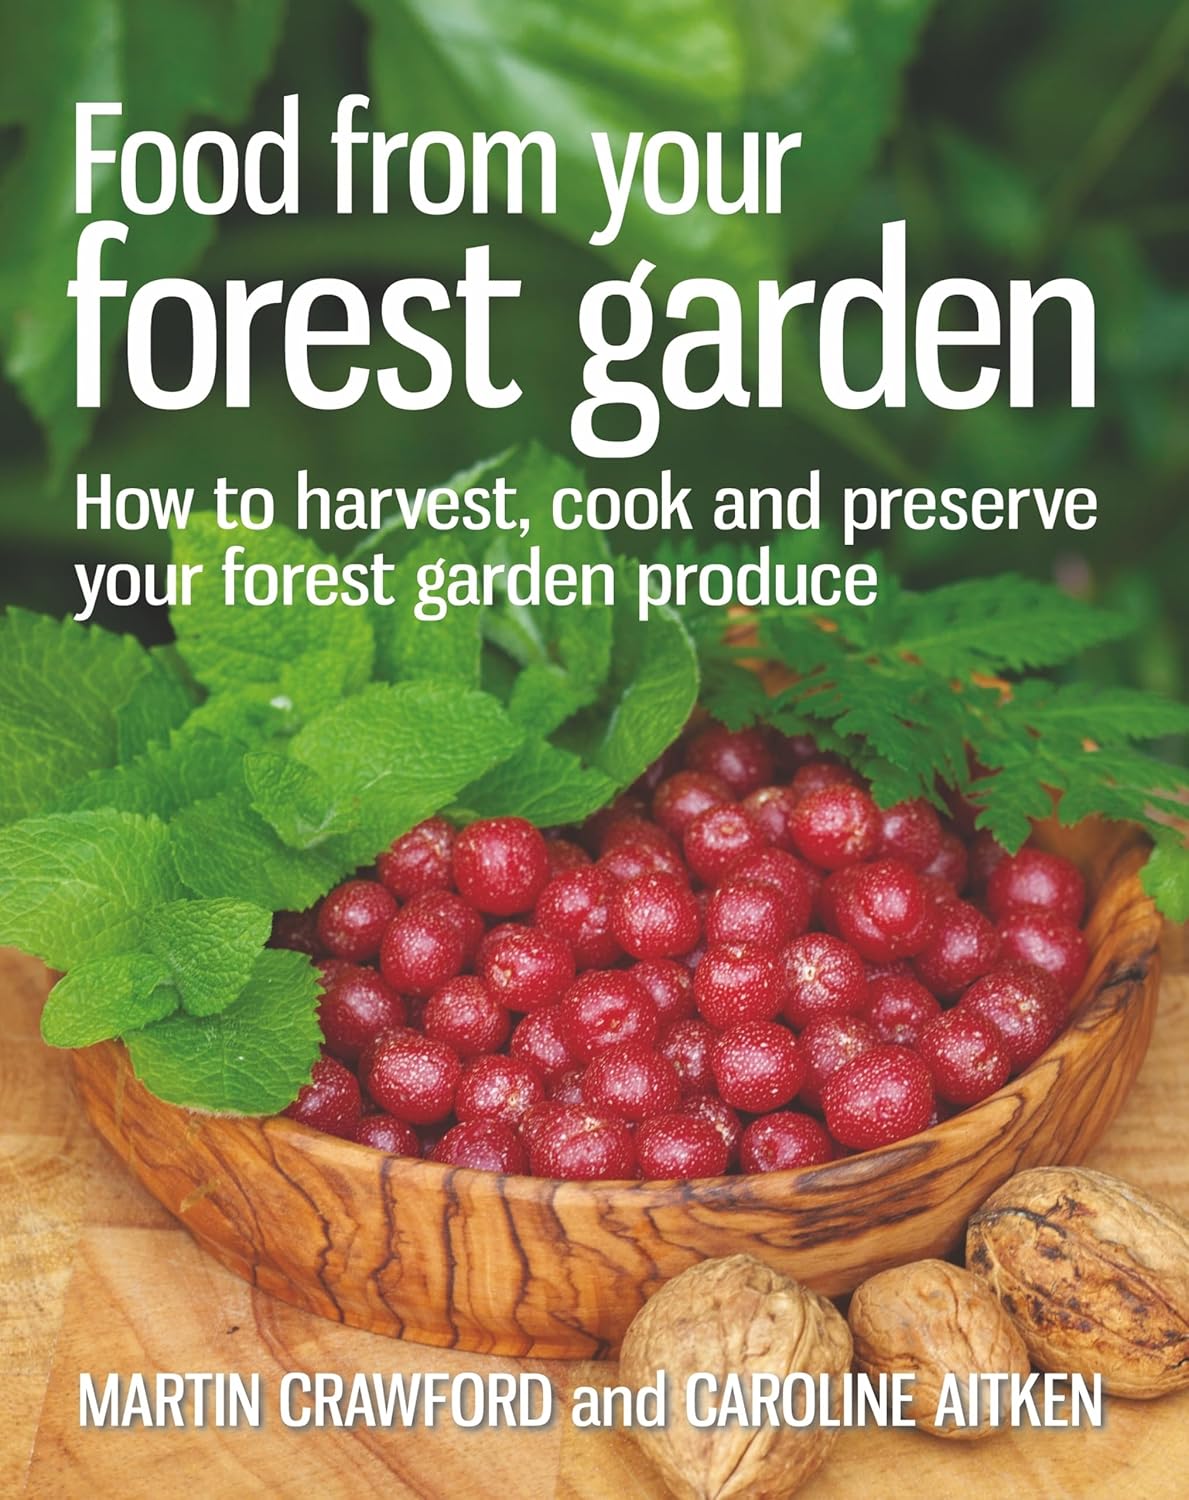
Forest gardening – a novel way of growing edible crops in different vertical layers – is attracting increasing interest, for gardens large or small. But when it comes to harvest time, how do you make the most of the produce?
From bamboo shoots and beech leaves to medlars and mashua, Food from your Forest Garden offers creative and imaginative ways to enjoy the crops from your forest garden. It provides cooking advice and recipe suggestions, with notes on every species in the bestselling Creating a Forest Garden by Martin Crawford. The book includes more than 100 recipes for over 50 different species, presented by season, plus raw food options. It also provides information on the plants’ nutritional value, with advice on harvesting and processing, as well as detailed instructions on preserving methods, from traditional preserves such as jams to ferments and fruit leathers.
With beautiful colour photographs of plants and recipes, this book is an invaluable resource for making the most of your forest garden – and an inspiration for anyone thinking of growing and using forest garden crops.
Review
They said, 'That’s all very well but what can we do with all the foods that come out of the forest garden?' Caroline Aitken has shown convincingly what you can do and that it can be delicious. --Patrick Whitefield
Food From Your Forest Garden is beautiful, inspiring and informative, the recipes are delicious yet undaunting, there are ideas aplenty and most importantly, whether you have a forest garden or just a few pots, it makes you want to grow some of what you eat. --Mark Diacono
About the Author
Excerpt. © Reprinted by permission. All rights reserved.
Food from Your Forest Garden
How to Harvest, Cook and Preserve your Forest Garden Produce
By Martin Crawford, Caroline Aitken, Jonanna BrownUIT Cambridge Ltd
Copyright © 2013 Martin Crawford and Caroline AitkenAll rights reserved.
ISBN: 978-0-85784-112-4
Contents
Title Page,Dedication,
Acknowledgements,
Introduction,
Part 1: Harvesting and preserving,
1. Harvesting,
2. Traditional preserves,
3. Drying fruit and nuts,
4. Fermenting,
Part 2: Recipes using fresh produce,
5. Spring,
6. Summer,
7. Autumn,
8. Winter,
Appendix 1: Forest garden food plants,
Appendix 2: Plants by month of use,
Resources,
Picture credits,
Index of recipes,
Main Index,
Copyright,
CHAPTER 1
Harvesting
Given the busy lives that many of us lead today, it is important to be able to harvest our food crops quickly and efficiently. There are some simple and easy tips to speed up harvesting, which are described here.
Spring ground shoots
Examples include: Solomon's seal, ostrich fern, bamboo.
Ground shoots emerge in the spring, usually very fast. Once they start, you should check at least twice a week for the new tender shoots to harvest.
With most shoots, cutting cleanly with a knife at ground level is easiest and quickest. Small shoots like ostrich fern can be snapped off by hand. With some shoots, like bamboo shoots, a longer shoot can be obtained by digging down and cutting some centimetres below ground, although it's not always clear that it's worth the work involved.
Leaves
Examples include: lime, chicory, mulberries.
There is a lot to be said for tearing leaves off plants when harvesting, rather than trying to pick them neatly by cutting or breaking the leaf stalk. It is much faster to tear them off, but it does not leave the plants looking neat and tidy! However, tearing is how most herbivores harvest leaves, and it is what most plants are adapted to – by tearing you do not break into the leaf cells but tear along lines of cells. As a result, the leaves do not wilt or brown so quickly, and the remnant left on the tree is not so susceptible to fungal diseases entering the leaf or stalk. Hence it is better all round!
Of course, many chefs also recommend tearing leaves in salads rather than chopping them – for the same reason as described above. However, if you are going to eat the salad quickly then it probably makes no real difference.
Fruits
Fruits from trees and shrubs are likely to be major crops in most people's forest gardens, so knowing the most efficient way to harvest them is vital.
Large high fruits
Examples include: plums, pears, apples – on larger trees.
There are two sensible options here. One is to use a telescopic fruit picker – these have a harvesting head with a kind of crenulated edge and cloth bag to catch the fruit. Once you have got the hang of them they can be relatively fast and you can harvest several fruit at once. It is quickest if you harvest with a second person, so you can lower the picker and allow them to empty the bag.
The other option is not to harvest high fruits from the tree at all, but rather from the ground. For this to be practical you need to use the fruits immediately, as they will bruise within hours of harvesting. Making juice from them is one obvious possibility, and of course cider apples and perry pears are always harvested from the ground.
To harvest from the ground you need to make sure the ground cover beneath the tree (grass or whatever) is cut short before the fruit drops. When most of the fruit has dropped (often after a storm) you can shake or tap the branches to encourage any last fruits down before you harvest. You can just pick them up by hand, but it's much easier to use an 'Apple Wizard' hand harvester. You roll this over the ground, and the fruits 'ping' inside the wire cage. When it's full, you empty it into a bucket by twisting it on a special attachment fixed to the bucket. It's very quick and saves your back a lot of strain!
Smaller fruits
Examples include: autumn olives, rosehips, currants.
There are various options for fast harvesting. Some fruit fall well when the branches are shaken – hawthorn fruits (haws) are a good example. For these it is best to lay out a sheet or tarpaulin beneath the tree or bush and shake branches of the whole thing vigorously when the fruits are fully ripe. Harvesting takes just a few minutes, though of course there will be a few leaves, spiders, etc. to remove from the fruits.
For small fruits that are borne within reach on reasonably long fruit stalks, a harvesting 'comb' (or 'berry picker') is a good investment. These are small plastic or wooden hand-held tools with which you comb the fruits off a bush. They're good for currants, chokeberries, etc. If the fruits are not fully ripe, the comb will often pull off some stalk too, and you will have to sort through and remove these after harvest.
Some fruits are borne so densely – autumn olive is a good example – that it speeds things up considerably to hold a harvesting container beneath the branch with one hand while picking and dropping fruit with the other. Or you can put a sheet or tarp down on the ground and pick and drop straight down on to it.
Nuts
Examples include: chestnuts, heartnuts, walnuts.
Nuts are nearly always harvested off the ground after they drop from the tree. To make locating and harvesting efficient, you usually need to ensure that the ground cover beneath the trees (grass or whatever) is cut short just before the nuts drop and are harvested.
Nuts should be harvested from the ground as frequently as possible – preferably daily. Nuts on the ground are susceptible to predation and to picking up nut-rotting fungi. In particular, squirrels are a big problem in many areas. It helps if, prior to harvesting each day, you can shake or knock the branches to bring down any loose nuts still in the tree.
We now use 'Nut Wizard' harvesters to harvest most of our nuts. These are incredibly efficient hand-held tools: like the 'Apple Wizard', they have a wire-cage head which you roll over the ground; the nuts are gathered inside the head, then emptied into a bucket. There are different-sized Wizards for hazelnuts, chestnuts and walnuts. Some chestnuts always fall with their spiny burrs intact, and on a small scale the only practical way to deal with these is to open them by hand, using gloves thick enough to prevent the prickles getting your hands.
Most of the mainstream nuts fall free of their husks, but some of the unusual ones may need further processing to remove them. Heartnuts are a case in point – these always fall still encased in their greenish husks. We harvest them with Nut Wizards, then, after some days, the husks start to blacken and become soft – at this stage they go into a concrete mixer(!) with a few stones and some water. After a few minutes the mixture is turned out and the heartnuts are cleaned and free of husk, and just needing drying.
Tubers
Examples include: mashua, oca, yams.
There is no quick way of harvesting these, you just have to dig! If they are perennial tubers, remember to leave some in the ground to regrow.
Mushrooms
Examples include: oyster mushrooms, shiitake.
Mushrooms on logs can be picked by twisting or cutting off – it seems to make no difference to cropping either way. Harvest shiitake mushrooms on logs before they are fully open – ideally about the time the veil that protects the gills has just separated from the stem, or a day or two after. If you leave them too long the flavour will have peaked, they may become tougher, and the risk of mushroom fly larvae invading the mushroom increases dramatically (you don't really need the extra protein from these, as shiitake are already high in protein!).
CHAPTER 2Traditional preserves
There are many books wholly devoted to the methods of preserving fruits and vegetables in sugar, vinegar or alcohol – namely, making jams, jellies, fruit 'cheeses', chutneys and vinegar or alcohol infusions In this chapter, then, we are simply attempting to show how simple these methods are and how easily they are applied to almost any fruit or vegetable crop.
Jams
In jams (and jellies and fruit 'cheeses'), fruits are preserved by mixing with enough sugar to prevent mould growth and fermentation. Too little sugar and the jam will start to mould in store; too much and you will end up with an over-sweetened, insipid product, similar to many commercial jams.
Most jam recipes add too much sugar. Martin's basic jam recipe uses 50 per cent fruit, 50 per cent sugar by weight, and this leads to flavourful products that keep well before they are opened. However, after opening you need to keep them in a fridge or use them within a few weeks, otherwise moulds will start to grow on the surface. Jams with higher sugar levels than this will store for longer in ambient air temperatures once they are opened.
The fruit in jams needs cooking to break down the skins and make the fruit pulpy. Ideally, in jam making the fruit should be cooked for as little time as possible. It helps a lot if you make small batches of jam – a couple of kilos (about 4½lb) at a time is best – because the fruits cook very quickly and the jam itself takes only 20-30 minutes to make and bottle, so you can easily fit it in between other kitchen jobs.
It is preferable to use a heavy-bottomed stainless steel pan for making jams, chutneys and so on, as this transfers heat evenly and reduces the risk of sticking.
General method for jams
You can use the following method for virtually any fruit. Try mixing different fruits to make your own unique jams.
If the fruit is your own and clean, there is no need to wash it; just weigh and place in a pan. Bought fruit should be washed and weighed.
Add the minimum amount of water necessary to enable you to heat the pan and break down the fruit without it sticking to the bottom of the pan: how much depends how juicy the fruit is. With currants, for example, you can add around 5mm (1/8") depth of water for 1-2kg (approx. 2-4½lb) of fruit; autumn olive needs more – around 11.5cm (3/8-5/8") depth for 2kg (4lb 6oz) of fruit.
Bring the fruit to the boil and cook just until the skins are well broken – 5 to 10 minutes should be enough – and stir well throughout to stop the fruit sticking and to ensure it is all cooked.
If you are making a jam from fruits with large seeds, for example haws, then the seeds should be removed now. Put the cooked fruit mixture through a Moulinex sieve to remove seeds and leave the pulp. Weigh the pulp again to determine the amount of sugar needed.
Next, add the sugar. Any kind of sugar can be used – brown granulated sugar is fine and is less refined than white sugar. Preserving sugar has large sugar crystals, which reduce the risk of burning and therefore the need for stirring constantly. Most sugar comes from either sugar beet or sugar cane; the former grown in temperate climes and the latter, of course, in the tropics. You might think that the local sugar is more 'eco', but that is not necessarily the case. Martin's own energy analysis of the two crops shows that more energy is used in the growing, processing and transport of sugar beet than in sugar cane. See box, right, for a discussion of sugar alternatives.
Add the same weight of sugar as you had of fruit to begin with (or of the pulp if you have removed seeds) for a 50:50 jam. Bring back to the boil and boil vigorously (called a rolling boil) for several minutes. Meanwhile, put a small ceramic plate in the fridge to cool down.
After a few minutes of boiling, and every few minutes afterwards if necessary, test the jam to see if it will set. If the jam is bottled before it is ready to set, then it will be runny (although still usable). Get out your now-cold plate from the fridge and drop a quarter of a teaspoon of the cooking jam on to it. Blow on it to help it cool. After a minute or so it will have cooled sufficiently for you to push the little pool of jam with your finger. If it has set, the skin on the jam surface will ruck up and wrinkle. If it has not set, the pool will just flow where you push it.
Once the jam is setting, take it off the heat immediately and pour into jars (see box opposite) with a jam funnel. It is far better to use screwtop jars than to try to cover jams with waxed paper, as it will keep much better. As a general rule, a couple of kilos of jam (1kg of fruit and 1kg of sugar) fills about six 400ml (14fl oz) jars.
Store somewhere cool if possible, and remember to label the jars with the contents and the date. However hard one tries, a two-year-old jar of jam always seems to lurk unnoticed at the back of the cupboard – at least if it's labelled you can identify it!
Jellies
Jelly is essentially jam without the bits! In order to get a clear jelly, more water is added to the fruit while cooking and the watery pulp is then passed through a jelly bag to extract the juice. Jelly bags are made of a thicker fabric than muslin, to ensure a really clear juice, and the process is slow. Traditionally the bag would be hung between the legs of an upturned stool to drip into a saucepan overnight – you could hang it from a door handle if you don't have a rustic milking stool to hand! It is good practice to boil the jelly bag before and after use to prevent it mouldering in storage.
Many traditional jellies use some kind of wild berry combined with apples or crab apples to add pectin. Examples include rowan jelly and rosehip jelly. Currants – for example, redcurrants for redcurrant jelly – are high in pectin and therefore don't need apples added to them. See the box on page 17 for some high- and low-pectin fruits that may be combined.
The basic ratios to use in making jelly are given in the box below left. Caroline's recipe for haw jelly, below, follows these guidelines.
General method for jellies
Once the juice has been extracted, the cooking method is the same as for jam (see page 18): bring the juice to the boil in a large, heavy-based saucepan, stir in the sugar and cook on a rolling boil until the jelly is ready to set. Test this using the cold plate test, then carefully transfer to hot sterilised jars with screw-top lids. Remember to label the jars with the date and contents.
Fruit 'cheeses'
Fruit 'cheeses' can be made with various tree fruits and are a great way to preserve some of an abundant harvest in a different way. They are not actually cheeses, of course, but firm fruit concentrates, somewhere between a jam and a fruit leather (for details of leathers, see page 35). They are also known as fruit paste or 'membrillo', and have been made traditionally in South America with fruits such as guava. They have perhaps been named 'cheeses' in the English-speaking world because they complement cheese very well and can be eaten with cheese and crackers, or as a sweet spread on bread.
General method for cheeses
A fruit cheese is a made in a very similar way to jam and jelly, but the aim is to create a firm paste which can either be spread or sliced, depending upon how firm you make it. Pears, medlars and haws make particularly good cheeses, as they create the right texture.
Place chopped large fruit or small whole fruit into a heavy-based saucepan and just cover with water. Boil the fruit until it forms a soft pulp, then sieve if necessary to remove cores, pips or skins. Weigh the sieved pulp and return it to the pan.
Weigh out the same measure (note: the same weight, not the same volume, in contrast to jellies) of granulated or preserving sugar and add that to the pulp. Add the juice and zest of one lemon to add pectin and enhance the flavour. Bring back to the boil, reduce to a simmer and stir regularly for between 1 and 3 hours. The length of time needed depends on how watery the pulp is and how thick you want your fruit cheese to be. The pulp will darken and thicken as it cooks and you will eventually be able to see the base of the pan for a second when you run the spoon across it.
You can use the cold plate test (as described in general method for jam, page 18) to check the consistency as you cook, and when it sets as thickly as you want it, pour the paste into sterilised jars, as with jam or jelly, or into moulds greased with butter, which can be turned out when the cheese is cool. Fruit cheeses in sterilised and sealed containers will keep for as long as jams and jellies, so label the jars or containers with the date and contents and enjoy throughout the year. If set in an open mould they will need to be refrigerated and eaten within a month.
Chutneys
In chutneys, vinegar is the agent of preservation, although some sugar is usually added to offset the acidity of the vinegar. Almost any mixture of vegetables and fruits can be preserved in this way, and will store for several years if required, although of course some nutrients will decline after a year or so. Chutneys are a great complement to cheeses, cold meats and Indian food.
General method for chutneys
The evening before you are going to cook the chutney, chop the vegetables and fruits into smallish pieces (around 1cm/½" or smaller) and place in a large heavy-based pan. Add salt and spices, mix well and leave overnight for the salt to draw out some of the juices.
The following day, add sugar and vinegar. The vinegar quality has a great bearing on the quality of the final product, so try to use wine or cider vinegar. You will want about 100g (3½oz) sugar and about 140ml (¼ pint) vinegar per 1kg (2lb 3oz) of vegetables/fruits.
Bring to the boil and simmer, uncovered, for 2 hours. Stir more often as the cooking progresses and the liquid reduces, to make sure the chutney does not stick to the bottom of the pan. The chutney will thicken as it cooks, and when it's ready you should be able to part the mixture with a spoon and see the bottom of the pan for a couple of seconds before the mixture closes back over it.
Bottle in hot sterilised jars (see page 19). The flavour of chutney matures over time and it is best to leave it for at least 2 months before eating. Label the jars clearly with the contents and date.
(Continues...)Excerpted from Food from Your Forest Garden by Martin Crawford, Caroline Aitken, Jonanna Brown. Copyright © 2013 Martin Crawford and Caroline Aitken. Excerpted by permission of UIT Cambridge Ltd.
All rights reserved. No part of this excerpt may be reproduced or reprinted without permission in writing from the publisher.
Excerpts are provided by Dial-A-Book Inc. solely for the personal use of visitors to this web site.
Details:
Visit the Green Books (UK) Store
Food from your Forest Garden: How to harvest, cook and preserve your forest garden produce
AED22688
Quantity:
Order today to get by 7-14 business days
This item qualifies for free delivery
'%3e%3crect%20x='0.599609'%20width='22.4'%20height='16'%20fill='%230A17A7'/%3e%3cpath%20fill-rule='evenodd'%20clip-rule='evenodd'%20d='M-0.426196%20-1.53223L9.1335%204.91587V-1.06506H14.4668V4.91648L24.0263%20-1.53147L25.2193%200.237148L17.6615%205.33494H23.0002V10.6683H17.6618L25.2187%2015.7655L24.0258%2017.5341L14.4668%2011.0865V17.0683H9.1335V11.0871L-0.425634%2017.5348L-1.61858%2015.7662L5.93947%2010.6683H0.600172V5.33494H5.93977L-1.61914%200.236387L-0.426196%20-1.53223Z'%20fill='white'/%3e%3cpath%20d='M15.5332%205.06615L25.6655%20-1.59961'%20stroke='%23DB1F35'%20stroke-width='0.533333'%20stroke-linecap='round'/%3e%3cpath%20d='M16.6094%2010.9578L25.6924%2017.0801'%20stroke='%23DB1F35'%20stroke-width='0.533333'%20stroke-linecap='round'/%3e%3cpath%20d='M7.00176%205.04727L-2.47266%20-1.33789'%20stroke='%23DB1F35'%20stroke-width='0.533333'%20stroke-linecap='round'/%3e%3cpath%20d='M8.02936%2010.8842L-2.47266%2017.8486'%20stroke='%23DB1F35'%20stroke-width='0.533333'%20stroke-linecap='round'/%3e%3cpath%20fill-rule='evenodd'%20clip-rule='evenodd'%20d='M0.599609%209.6H10.1996V16H13.3996V9.6H22.9996V6.4H13.3996V0H10.1996V6.4H0.599609V9.6Z'%20fill='%23E6273E'/%3e%3c/g%3e%3c/svg%3e) Imported From: United Kingdom
Imported From: United Kingdom
At BOLO, we work hard to ensure the products you receive are new, genuine, and sourced from reputable suppliers.
Every product in the BOLO catalogue is sourced through our Verified Global Supply Network of verified sellers, authorized distributors or directly from the manufacturer.
Each product undergoes thorough inspection and verification at our consolidation and fulfilment centers to ensure it meets our strict authenticity and quality standards before being shipped and delivered to you.
If you ever have concerns regarding the authenticity of a product purchased from us, please contact Bolo Support. We will review your inquiry promptly and, if necessary, provide documentation verifying authenticity or offer a suitable resolution.
Your trust is our top priority, and we are committed to maintaining transparency and integrity in every transaction.
While we strive to display accurate information, variations in packaging, labeling, instructions, or formulation may occasionally occur due to regional differences or supplier updates. For detailed or manufacturer-specific information, please contact the brand directly or reach out to BOLO Support for assistance.
Unless otherwise stated, all prices displayed on the product page include applicable taxes and import duties.
BOLO operates in accordance with the laws and regulations of United Arab Emirates. Any items found to be restricted or prohibited for sale within the United Arab Emirates will be cancelled prior to shipment. We take proactive measures to ensure that only products permitted for sale in United Arab Emirates are listed on our website.
All items are shipped by air, and any products classified as “Dangerous Goods (DG)” under IATA regulations will be removed from the order and cancelled.
All orders are processed manually, and we make every effort to process them promptly once confirmed. Products cancelled due to the above reasons will be permanently removed from listings across the website.
More from this brand
Similar items from “Organic & Sustainable”
Share with
Or share with link
https://www.bolo.ae/products/K0857841122
Visit the Green Books (UK) Store
Food from your Forest Garden: How to harvest, cook and preserve your forest garden produce
AED22688
Quantity:
Order today to get by 7-14 business days
This item qualifies for free delivery
Imported From: United Kingdom
At BOLO, we work hard to ensure the products you receive are new, genuine, and sourced from reputable suppliers.
Every product in the BOLO catalogue is sourced through our Verified Global Supply Network of verified sellers, authorized distributors or directly from the manufacturer.
Each product undergoes thorough inspection and verification at our consolidation and fulfilment centers to ensure it meets our strict authenticity and quality standards before being shipped and delivered to you.
If you ever have concerns regarding the authenticity of a product purchased from us, please contact Bolo Support. We will review your inquiry promptly and, if necessary, provide documentation verifying authenticity or offer a suitable resolution.
Your trust is our top priority, and we are committed to maintaining transparency and integrity in every transaction.
While we strive to display accurate information, variations in packaging, labeling, instructions, or formulation may occasionally occur due to regional differences or supplier updates. For detailed or manufacturer-specific information, please contact the brand directly or reach out to BOLO Support for assistance.
Unless otherwise stated, all prices displayed on the product page include applicable taxes and import duties.
BOLO operates in accordance with the laws and regulations of United Arab Emirates. Any items found to be restricted or prohibited for sale within the United Arab Emirates will be cancelled prior to shipment. We take proactive measures to ensure that only products permitted for sale in United Arab Emirates are listed on our website.
All items are shipped by air, and any products classified as “Dangerous Goods (DG)” under IATA regulations will be removed from the order and cancelled.
All orders are processed manually, and we make every effort to process them promptly once confirmed. Products cancelled due to the above reasons will be permanently removed from listings across the website.
Description:
Forest gardening – a novel way of growing edible crops in different vertical layers – is attracting increasing interest, for gardens large or small. But when it comes to harvest time, how do you make the most of the produce?
From bamboo shoots and beech leaves to medlars and mashua, Food from your Forest Garden offers creative and imaginative ways to enjoy the crops from your forest garden. It provides cooking advice and recipe suggestions, with notes on every species in the bestselling Creating a Forest Garden by Martin Crawford. The book includes more than 100 recipes for over 50 different species, presented by season, plus raw food options. It also provides information on the plants’ nutritional value, with advice on harvesting and processing, as well as detailed instructions on preserving methods, from traditional preserves such as jams to ferments and fruit leathers.
With beautiful colour photographs of plants and recipes, this book is an invaluable resource for making the most of your forest garden – and an inspiration for anyone thinking of growing and using forest garden crops.
Review
They said, 'That’s all very well but what can we do with all the foods that come out of the forest garden?' Caroline Aitken has shown convincingly what you can do and that it can be delicious. --Patrick Whitefield
Food From Your Forest Garden is beautiful, inspiring and informative, the recipes are delicious yet undaunting, there are ideas aplenty and most importantly, whether you have a forest garden or just a few pots, it makes you want to grow some of what you eat. --Mark Diacono
About the Author
Excerpt. © Reprinted by permission. All rights reserved.
Food from Your Forest Garden
How to Harvest, Cook and Preserve your Forest Garden Produce
By Martin Crawford, Caroline Aitken, Jonanna BrownUIT Cambridge Ltd
Copyright © 2013 Martin Crawford and Caroline AitkenAll rights reserved.
ISBN: 978-0-85784-112-4
Contents
Title Page,Dedication,
Acknowledgements,
Introduction,
Part 1: Harvesting and preserving,
1. Harvesting,
2. Traditional preserves,
3. Drying fruit and nuts,
4. Fermenting,
Part 2: Recipes using fresh produce,
5. Spring,
6. Summer,
7. Autumn,
8. Winter,
Appendix 1: Forest garden food plants,
Appendix 2: Plants by month of use,
Resources,
Picture credits,
Index of recipes,
Main Index,
Copyright,
CHAPTER 1
Harvesting
Given the busy lives that many of us lead today, it is important to be able to harvest our food crops quickly and efficiently. There are some simple and easy tips to speed up harvesting, which are described here.
Spring ground shoots
Examples include: Solomon's seal, ostrich fern, bamboo.
Ground shoots emerge in the spring, usually very fast. Once they start, you should check at least twice a week for the new tender shoots to harvest.
With most shoots, cutting cleanly with a knife at ground level is easiest and quickest. Small shoots like ostrich fern can be snapped off by hand. With some shoots, like bamboo shoots, a longer shoot can be obtained by digging down and cutting some centimetres below ground, although it's not always clear that it's worth the work involved.
Leaves
Examples include: lime, chicory, mulberries.
There is a lot to be said for tearing leaves off plants when harvesting, rather than trying to pick them neatly by cutting or breaking the leaf stalk. It is much faster to tear them off, but it does not leave the plants looking neat and tidy! However, tearing is how most herbivores harvest leaves, and it is what most plants are adapted to – by tearing you do not break into the leaf cells but tear along lines of cells. As a result, the leaves do not wilt or brown so quickly, and the remnant left on the tree is not so susceptible to fungal diseases entering the leaf or stalk. Hence it is better all round!
Of course, many chefs also recommend tearing leaves in salads rather than chopping them – for the same reason as described above. However, if you are going to eat the salad quickly then it probably makes no real difference.
Fruits
Fruits from trees and shrubs are likely to be major crops in most people's forest gardens, so knowing the most efficient way to harvest them is vital.
Large high fruits
Examples include: plums, pears, apples – on larger trees.
There are two sensible options here. One is to use a telescopic fruit picker – these have a harvesting head with a kind of crenulated edge and cloth bag to catch the fruit. Once you have got the hang of them they can be relatively fast and you can harvest several fruit at once. It is quickest if you harvest with a second person, so you can lower the picker and allow them to empty the bag.
The other option is not to harvest high fruits from the tree at all, but rather from the ground. For this to be practical you need to use the fruits immediately, as they will bruise within hours of harvesting. Making juice from them is one obvious possibility, and of course cider apples and perry pears are always harvested from the ground.
To harvest from the ground you need to make sure the ground cover beneath the tree (grass or whatever) is cut short before the fruit drops. When most of the fruit has dropped (often after a storm) you can shake or tap the branches to encourage any last fruits down before you harvest. You can just pick them up by hand, but it's much easier to use an 'Apple Wizard' hand harvester. You roll this over the ground, and the fruits 'ping' inside the wire cage. When it's full, you empty it into a bucket by twisting it on a special attachment fixed to the bucket. It's very quick and saves your back a lot of strain!
Smaller fruits
Examples include: autumn olives, rosehips, currants.
There are various options for fast harvesting. Some fruit fall well when the branches are shaken – hawthorn fruits (haws) are a good example. For these it is best to lay out a sheet or tarpaulin beneath the tree or bush and shake branches of the whole thing vigorously when the fruits are fully ripe. Harvesting takes just a few minutes, though of course there will be a few leaves, spiders, etc. to remove from the fruits.
For small fruits that are borne within reach on reasonably long fruit stalks, a harvesting 'comb' (or 'berry picker') is a good investment. These are small plastic or wooden hand-held tools with which you comb the fruits off a bush. They're good for currants, chokeberries, etc. If the fruits are not fully ripe, the comb will often pull off some stalk too, and you will have to sort through and remove these after harvest.
Some fruits are borne so densely – autumn olive is a good example – that it speeds things up considerably to hold a harvesting container beneath the branch with one hand while picking and dropping fruit with the other. Or you can put a sheet or tarp down on the ground and pick and drop straight down on to it.
Nuts
Examples include: chestnuts, heartnuts, walnuts.
Nuts are nearly always harvested off the ground after they drop from the tree. To make locating and harvesting efficient, you usually need to ensure that the ground cover beneath the trees (grass or whatever) is cut short just before the nuts drop and are harvested.
Nuts should be harvested from the ground as frequently as possible – preferably daily. Nuts on the ground are susceptible to predation and to picking up nut-rotting fungi. In particular, squirrels are a big problem in many areas. It helps if, prior to harvesting each day, you can shake or knock the branches to bring down any loose nuts still in the tree.
We now use 'Nut Wizard' harvesters to harvest most of our nuts. These are incredibly efficient hand-held tools: like the 'Apple Wizard', they have a wire-cage head which you roll over the ground; the nuts are gathered inside the head, then emptied into a bucket. There are different-sized Wizards for hazelnuts, chestnuts and walnuts. Some chestnuts always fall with their spiny burrs intact, and on a small scale the only practical way to deal with these is to open them by hand, using gloves thick enough to prevent the prickles getting your hands.
Most of the mainstream nuts fall free of their husks, but some of the unusual ones may need further processing to remove them. Heartnuts are a case in point – these always fall still encased in their greenish husks. We harvest them with Nut Wizards, then, after some days, the husks start to blacken and become soft – at this stage they go into a concrete mixer(!) with a few stones and some water. After a few minutes the mixture is turned out and the heartnuts are cleaned and free of husk, and just needing drying.
Tubers
Examples include: mashua, oca, yams.
There is no quick way of harvesting these, you just have to dig! If they are perennial tubers, remember to leave some in the ground to regrow.
Mushrooms
Examples include: oyster mushrooms, shiitake.
Mushrooms on logs can be picked by twisting or cutting off – it seems to make no difference to cropping either way. Harvest shiitake mushrooms on logs before they are fully open – ideally about the time the veil that protects the gills has just separated from the stem, or a day or two after. If you leave them too long the flavour will have peaked, they may become tougher, and the risk of mushroom fly larvae invading the mushroom increases dramatically (you don't really need the extra protein from these, as shiitake are already high in protein!).
CHAPTER 2Traditional preserves
There are many books wholly devoted to the methods of preserving fruits and vegetables in sugar, vinegar or alcohol – namely, making jams, jellies, fruit 'cheeses', chutneys and vinegar or alcohol infusions In this chapter, then, we are simply attempting to show how simple these methods are and how easily they are applied to almost any fruit or vegetable crop.
Jams
In jams (and jellies and fruit 'cheeses'), fruits are preserved by mixing with enough sugar to prevent mould growth and fermentation. Too little sugar and the jam will start to mould in store; too much and you will end up with an over-sweetened, insipid product, similar to many commercial jams.
Most jam recipes add too much sugar. Martin's basic jam recipe uses 50 per cent fruit, 50 per cent sugar by weight, and this leads to flavourful products that keep well before they are opened. However, after opening you need to keep them in a fridge or use them within a few weeks, otherwise moulds will start to grow on the surface. Jams with higher sugar levels than this will store for longer in ambient air temperatures once they are opened.
The fruit in jams needs cooking to break down the skins and make the fruit pulpy. Ideally, in jam making the fruit should be cooked for as little time as possible. It helps a lot if you make small batches of jam – a couple of kilos (about 4½lb) at a time is best – because the fruits cook very quickly and the jam itself takes only 20-30 minutes to make and bottle, so you can easily fit it in between other kitchen jobs.
It is preferable to use a heavy-bottomed stainless steel pan for making jams, chutneys and so on, as this transfers heat evenly and reduces the risk of sticking.
General method for jams
You can use the following method for virtually any fruit. Try mixing different fruits to make your own unique jams.
If the fruit is your own and clean, there is no need to wash it; just weigh and place in a pan. Bought fruit should be washed and weighed.
Add the minimum amount of water necessary to enable you to heat the pan and break down the fruit without it sticking to the bottom of the pan: how much depends how juicy the fruit is. With currants, for example, you can add around 5mm (1/8") depth of water for 1-2kg (approx. 2-4½lb) of fruit; autumn olive needs more – around 11.5cm (3/8-5/8") depth for 2kg (4lb 6oz) of fruit.
Bring the fruit to the boil and cook just until the skins are well broken – 5 to 10 minutes should be enough – and stir well throughout to stop the fruit sticking and to ensure it is all cooked.
If you are making a jam from fruits with large seeds, for example haws, then the seeds should be removed now. Put the cooked fruit mixture through a Moulinex sieve to remove seeds and leave the pulp. Weigh the pulp again to determine the amount of sugar needed.
Next, add the sugar. Any kind of sugar can be used – brown granulated sugar is fine and is less refined than white sugar. Preserving sugar has large sugar crystals, which reduce the risk of burning and therefore the need for stirring constantly. Most sugar comes from either sugar beet or sugar cane; the former grown in temperate climes and the latter, of course, in the tropics. You might think that the local sugar is more 'eco', but that is not necessarily the case. Martin's own energy analysis of the two crops shows that more energy is used in the growing, processing and transport of sugar beet than in sugar cane. See box, right, for a discussion of sugar alternatives.
Add the same weight of sugar as you had of fruit to begin with (or of the pulp if you have removed seeds) for a 50:50 jam. Bring back to the boil and boil vigorously (called a rolling boil) for several minutes. Meanwhile, put a small ceramic plate in the fridge to cool down.
After a few minutes of boiling, and every few minutes afterwards if necessary, test the jam to see if it will set. If the jam is bottled before it is ready to set, then it will be runny (although still usable). Get out your now-cold plate from the fridge and drop a quarter of a teaspoon of the cooking jam on to it. Blow on it to help it cool. After a minute or so it will have cooled sufficiently for you to push the little pool of jam with your finger. If it has set, the skin on the jam surface will ruck up and wrinkle. If it has not set, the pool will just flow where you push it.
Once the jam is setting, take it off the heat immediately and pour into jars (see box opposite) with a jam funnel. It is far better to use screwtop jars than to try to cover jams with waxed paper, as it will keep much better. As a general rule, a couple of kilos of jam (1kg of fruit and 1kg of sugar) fills about six 400ml (14fl oz) jars.
Store somewhere cool if possible, and remember to label the jars with the contents and the date. However hard one tries, a two-year-old jar of jam always seems to lurk unnoticed at the back of the cupboard – at least if it's labelled you can identify it!
Jellies
Jelly is essentially jam without the bits! In order to get a clear jelly, more water is added to the fruit while cooking and the watery pulp is then passed through a jelly bag to extract the juice. Jelly bags are made of a thicker fabric than muslin, to ensure a really clear juice, and the process is slow. Traditionally the bag would be hung between the legs of an upturned stool to drip into a saucepan overnight – you could hang it from a door handle if you don't have a rustic milking stool to hand! It is good practice to boil the jelly bag before and after use to prevent it mouldering in storage.
Many traditional jellies use some kind of wild berry combined with apples or crab apples to add pectin. Examples include rowan jelly and rosehip jelly. Currants – for example, redcurrants for redcurrant jelly – are high in pectin and therefore don't need apples added to them. See the box on page 17 for some high- and low-pectin fruits that may be combined.
The basic ratios to use in making jelly are given in the box below left. Caroline's recipe for haw jelly, below, follows these guidelines.
General method for jellies
Once the juice has been extracted, the cooking method is the same as for jam (see page 18): bring the juice to the boil in a large, heavy-based saucepan, stir in the sugar and cook on a rolling boil until the jelly is ready to set. Test this using the cold plate test, then carefully transfer to hot sterilised jars with screw-top lids. Remember to label the jars with the date and contents.
Fruit 'cheeses'
Fruit 'cheeses' can be made with various tree fruits and are a great way to preserve some of an abundant harvest in a different way. They are not actually cheeses, of course, but firm fruit concentrates, somewhere between a jam and a fruit leather (for details of leathers, see page 35). They are also known as fruit paste or 'membrillo', and have been made traditionally in South America with fruits such as guava. They have perhaps been named 'cheeses' in the English-speaking world because they complement cheese very well and can be eaten with cheese and crackers, or as a sweet spread on bread.
General method for cheeses
A fruit cheese is a made in a very similar way to jam and jelly, but the aim is to create a firm paste which can either be spread or sliced, depending upon how firm you make it. Pears, medlars and haws make particularly good cheeses, as they create the right texture.
Place chopped large fruit or small whole fruit into a heavy-based saucepan and just cover with water. Boil the fruit until it forms a soft pulp, then sieve if necessary to remove cores, pips or skins. Weigh the sieved pulp and return it to the pan.
Weigh out the same measure (note: the same weight, not the same volume, in contrast to jellies) of granulated or preserving sugar and add that to the pulp. Add the juice and zest of one lemon to add pectin and enhance the flavour. Bring back to the boil, reduce to a simmer and stir regularly for between 1 and 3 hours. The length of time needed depends on how watery the pulp is and how thick you want your fruit cheese to be. The pulp will darken and thicken as it cooks and you will eventually be able to see the base of the pan for a second when you run the spoon across it.
You can use the cold plate test (as described in general method for jam, page 18) to check the consistency as you cook, and when it sets as thickly as you want it, pour the paste into sterilised jars, as with jam or jelly, or into moulds greased with butter, which can be turned out when the cheese is cool. Fruit cheeses in sterilised and sealed containers will keep for as long as jams and jellies, so label the jars or containers with the date and contents and enjoy throughout the year. If set in an open mould they will need to be refrigerated and eaten within a month.
Chutneys
In chutneys, vinegar is the agent of preservation, although some sugar is usually added to offset the acidity of the vinegar. Almost any mixture of vegetables and fruits can be preserved in this way, and will store for several years if required, although of course some nutrients will decline after a year or so. Chutneys are a great complement to cheeses, cold meats and Indian food.
General method for chutneys
The evening before you are going to cook the chutney, chop the vegetables and fruits into smallish pieces (around 1cm/½" or smaller) and place in a large heavy-based pan. Add salt and spices, mix well and leave overnight for the salt to draw out some of the juices.
The following day, add sugar and vinegar. The vinegar quality has a great bearing on the quality of the final product, so try to use wine or cider vinegar. You will want about 100g (3½oz) sugar and about 140ml (¼ pint) vinegar per 1kg (2lb 3oz) of vegetables/fruits.
Bring to the boil and simmer, uncovered, for 2 hours. Stir more often as the cooking progresses and the liquid reduces, to make sure the chutney does not stick to the bottom of the pan. The chutney will thicken as it cooks, and when it's ready you should be able to part the mixture with a spoon and see the bottom of the pan for a couple of seconds before the mixture closes back over it.
Bottle in hot sterilised jars (see page 19). The flavour of chutney matures over time and it is best to leave it for at least 2 months before eating. Label the jars clearly with the contents and date.
(Continues...)Excerpted from Food from Your Forest Garden by Martin Crawford, Caroline Aitken, Jonanna Brown. Copyright © 2013 Martin Crawford and Caroline Aitken. Excerpted by permission of UIT Cambridge Ltd.
All rights reserved. No part of this excerpt may be reproduced or reprinted without permission in writing from the publisher.
Excerpts are provided by Dial-A-Book Inc. solely for the personal use of visitors to this web site.
Details:
More from this brand
Similar items from “Organic & Sustainable”
Share with
Or share with link
https://www.bolo.ae/products/K0857841122